Why follow a procedure?
When plugging a sound source into a mixer input channel we must follow a safe procedure. This is for a number of reasons ...
- To ensure the signal does not overload the channel circuitry/exceed the dynamic range (and cause distortion)
- To ensure the signal is not so quiet as to be overwhelmed or spoilt by any inherent hiss or noise in the channel circuitry
- To avoid damaging the speakers
- To avoid damaging our hearing
- To avoid damaging a microphone
Mic, instrument and line level signals
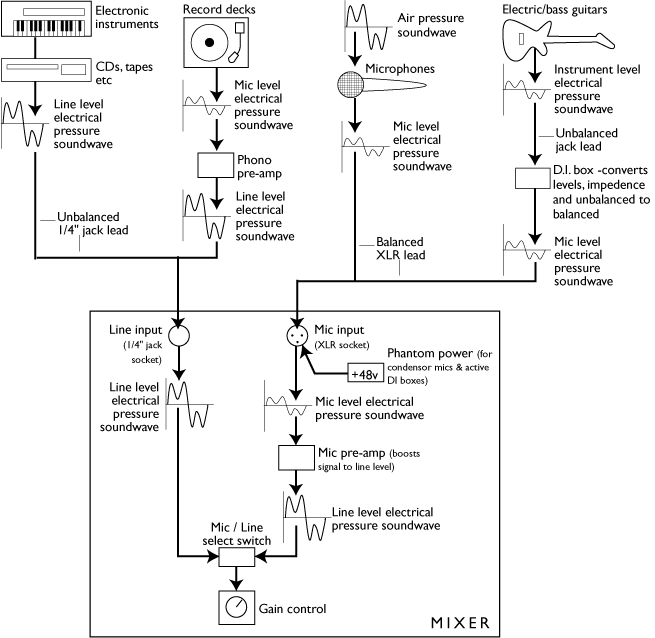
In the studio the difference between the quietest and the loudest source signals can be huge. There are 3 categories of signal which instruments and sources create ...
- Mic level signals are created by microphones and are very quiet.
- Instrument level signals are produced primarily from instruments with pickups such as electric bass and guitar and are louder than mic level signals.
- Line level signals are much louder than both mic and instrument level signals.They are the most common and are produced by keyboards, samplers, synthesisers, drum machines, CD and DVD players, mixers, FX processors, soundcards etc.
Read more about the different types of audio signal here
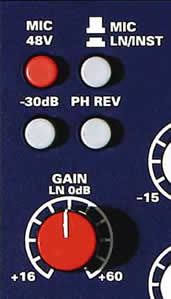
The control for the input stage of
a mixer (pre-amp)
Mixer channel input stages
To accommodate the huge difference in level and impendence between Mic and Line signals, each input channel of a mixer has two input circuits, Mic Input and Line Input. The Mic input circuitry will be fed from an XLR (Canon) socket. The Line input circuitry will usually be fed from a Jack socket, either unbalanced (mono jack) or balanced (stereo jack or XLR).
Mic/Line select switch
A Mic/Line button will allows the appropriate circuit to be selected for the source signal. Note that by the time the mic and line signals get to this button they will both be at line level, the mic level signal having been converted by a mic pre-amp circuit.
Pad switch
A pad button will allow the input signal to be reduced by typically 10-30dB if it is overloading the circuitry.
Phase reverse switch
This switch will reverse the polarity of the signal and is useful if phase problems arise, which is often the case when a single source is being recorded with several microphones.
Phantom power switch
To send phantom power to an active DI box or condenser mic.
Gain control
A gain control will allow you to turn down the signal so it doesn't overload the channel circuitry, a process known as "maximising the dynamic range" or "setting the best signal to noise ratio". Note that the gain control does not boost or turn up the signal, it only determines how much of the signal will pass.
Maximising the dynamic range
All equipment has dynamic range. This is the range between the quietest and loudest signals it can accommodate, or between the noise floor (beneath which a sound cannot be heard) and distortion. A signal entering a mixer needs to be as loud as possible without overloading the circuitry and causing distortion.
Setting the best signal to noise ratio
All circuits produce a fixed level of noise (hiss). If the source signal is loud enough this noise will be less noticeable.
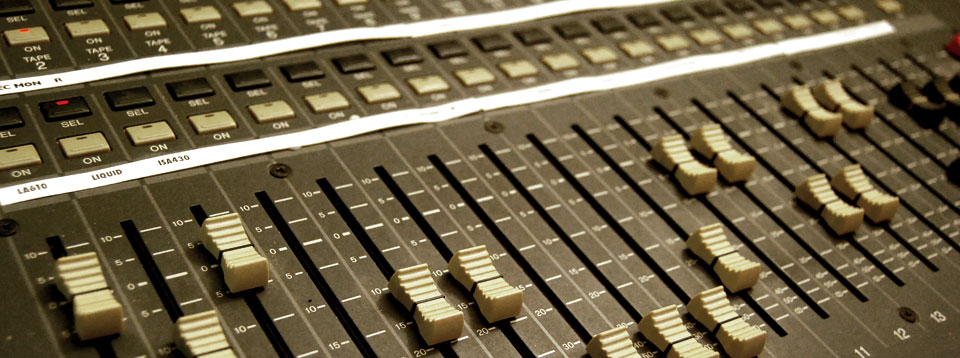
Connecting a source to a mixer
Here's the method I use ...
- Select a free input channel, mute it, lower its fader to 0, and route it to the master faders
- Turn down the gain control at the top of the channel in the input section to 0
- If your source has an output volume control, set it to maximum
- Connect your source to the appropriate input (mic or line)
- Select the input source (mic or line) with the mic/line button
- Apply phantom power if you are connecting an active DI box or a condenser microphone
- Ask the performer to sing or play as loudly as possible
- Slowly raise the gain control until the peak led lights then back off a bit (you will still be hearing nothing, just use your eyes)
- Un-mute the channel and slowly raise the channel fader to hear the source