This article gives practical advice on choosing and buying a patchbay. You may wish to read our article on interconnection and balanced/unbalanced signals first.
Now, click to watch our video at our sister site (or read on) ..
What is an audio patchbay?
The concept of an audio patchbay is easy to understand. Every piece of audio equipment, from synthesisers to mixing desks, interconnects via leads plugged into sockets which are usually located on their rear panels. If you need to change these connections you must remove and reconnect these leads.
So why is that a problem? ...
- You may have difficulty getting to the connections if equipment is sited against walls or located inside cabinets.
- You may find that the cables are not long enough to make your new connection.
- It will not be immediately apparent what is connected to what (patchbays can be labeled).
- Your creative flow may be disrupted if you need to stop what you're doing to reconnect your equipment.
The solution is to run all the leads from your equipment to a centrally located series of sockets called a patchbay. Equipment can then easily be connected with short patch cords (or patch leads).
Why do I need a patchbay?
If you run a professional studio you will already have a comprehensive patchbay and know why. If you have a home studio and do not regularly change the routing of your equipment you may not need a patchbay for all your connections, but it is very likely that you will benefit from some of your equipment's connections being easily available.
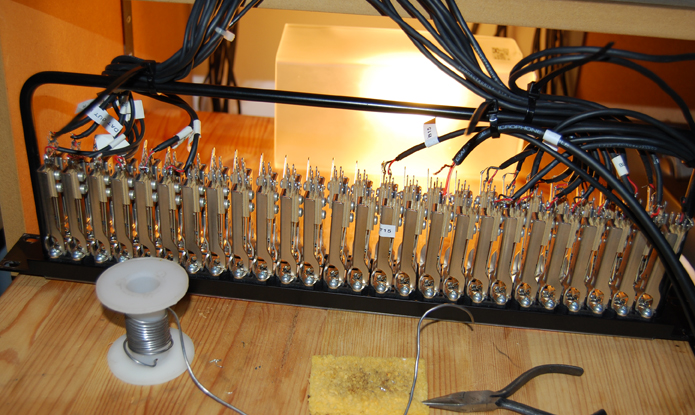
A type B patchbay being wired up
Project studio patchbays
Like many people who have moved from running a professional studio to having a project studio at home, I found that I no longer needed a comprehensive patchbay. But there are some connections that I regularly change, and having a patchbay allows me to do this without disrupting my creative processes. On my patchbay I have the following connections ...
- Mixer 2-track (monitor) in
- PC out (L & R)
- Laptop out (L & R)
- Phono (record deck) pre-amp out (L & R)
- CD recorder in & out (L & R)
- Channel strip pre-amp line in
- Channel strip pre-amp instrument in
- Channel strip per-amp mic in
- Guitar tuner (in & out)
- Guitar pedal board (in & out)
- Guitar rack effect processor (in & out)
- Guitar amp 1 instrument in
- Guitar amp 1 pre-amp out
- Guitar amp 1 power amp in
Having these connections on a patchbay allows me to monitor the audio from my work computers (PC and laptop) and listen to my vinyl, and create and record different guitar tone combinations quickly. All my other equipment is connected directly and has never been changed.
What sort of signals should I route through my audio patchbay?
As a general rule, you can route any signal through an audio patchbay except those which if accidentally patched to the wrong piece of equipment could damage it. Incidentally, you can buy other types of patchbay for MIDI, digital signals etc
| Acceptable | Unacceptable |
|---|---|
| Line level - keyboards, synthesisers, samplers, drum machines, tape recorders, soundcard's, mixers, effects, dynamics, CD players, headphones etc. Mic level - Microphones and pre-amps, guitars, bass and pre-amps, phono (record decks). Digital signals - AES and SPDIF. |
Power amp outputs Speakers Mains power Digital optical (obviously!) MIDI Computer connections |
Should I buy a balanced or unbalanced patchbay?
Even if you only have unbalanced equipment you still need a balanced patchbay to make your studio future proof. This is because the time WILL come when you acquire a balanced piece of equipment.
- A balanced patchbay can easily be used with unbalanced signals.
- An unbalanced patchbay cannot be used with balanced signals.
Here is a quick recap on some balanced and unbalanced interconnection types ...
| Equipment type | Connection | |
|---|---|---|
| Balanced | Unbalanced | |
| Microphone | Yes | No |
| Synthesiser / keyboard / rack | No | Yes |
| Guitar / bass | No | Yes |
| Outboard (effects, dynamics etc) | Yes | Yes |
| Mixing desk | Yes | Yes |
| CD player | No | Yes |
| Computer soundcard | No | Yes |
| Computer audio interface | Yes | Yes |
| AES digital | Yes | No |
| SPDIF digital | No | Yes |
Balanced/unbalanced connection theory is covered in Interconnection.
What is normalisation?
Normalizing is a wiring configuration whereby vertically adjacent sockets are permanently connected together even when no patch cord is plugged in. This allows you to have default connections which can be changed when required. When you insert a chord the connection is either broken or an additional feed of the signal is taken. Most patchbays allow you to normalise by either changing the alignment of each sockets PCB or performing a simple solder.
The theory of patchbay wiring and normalization is covered in this pdf article.
What are the different types of analogue audio patchbay?
Patchbay's are categorized by the 3 different connector types they use.
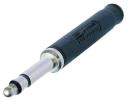
Type A jacks
These use the standard musical instrument (keyboards, guitars etc) and semi-pro recording equipment connector.
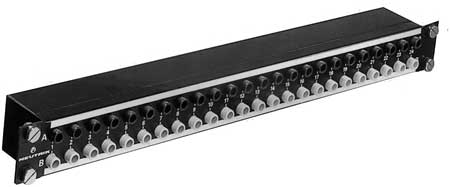

Type B jacks (GPO)
These connectors were used in the early days of telephone exchanges when connections were made manually by operators. They are very robust and hard wearing. The plug is physically similar to Type A but the tip is shaped differently and the metal is superior. You should never insert a Type A jack into a Type B socket.


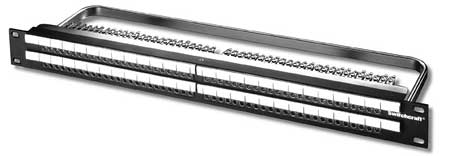
Bantam
Essentially a mini version of the Type B (GPO) jack. Developed by mixing desk manufacturers to allow a greater density of sockets in a given space.
What are the pros and cons of the different types of audio patchbay?
|
Balanced / unbalanced | Rear connections | Ease of wiring | Convenience | Cost | Reliability |
|---|---|---|---|---|---|---|
| Type A jacks | Balanced & unbalanced | Solder terminals or jack sockets | Simple | Good. Instruments can be connected directly to the front. | Low | Fair to poor. Cheap ones are a waste of money, the connections deteriorate soon. |
| Type B jacks | Balanced, but can carry unbalanced signals | Solder terminals or EDAC's | Simple | Good but front instrument connection requires Type A to B leads. | High | Excellent. Robust construction, brass contacts and large jack contact area. |
| Bantam | Balanced, but can carry unbalanced signals | Solder terminals | Tricky | Excellent and compact, but front instrument connection requires Type A to Bantam leads. | High | Good. Robust construction, brass contacts but small jack contact area. |
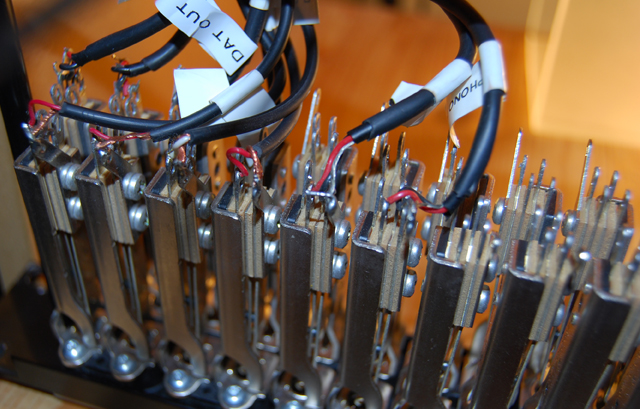
Close up of the rear terminals of a type B patchbay
Buying Recommendations
If you are still unsure about what type of patchbay to buy, here are my recommendations ...
-
Patchbay type Buy a Type B GPO patchbay. They are incredibly strong and robust and will give you years of trouble free use.
-
Normalizing options You should ensure that whatever patchbay you choose, the full range of normalization options is possible.
-
Tie bar Ensure you get a tie bar to support your cables at the back.
From bitter experience I would suggest you avoid cheap type A patchbay's. They tend to be unreliable, become intermittent quickly and are NOT the cost effective solution they appear to be.
How do I design and configure a patchbay?
There are no absolute rights or wrongs but the following are a few sensible guidelines ...
- Create a list of all necessary connections/equipment.
- Create a diagrammatic illustration of your patchbay.
- Group rows of sockets into categories, eg mixer inputs.
- Alternate between rows of outputs and inputs. outputs above and inputs below.
- Obviously you will want connections which are to be normalised to be vertically adjacent.
Patchbay wiring
Click here for an overview of patchbay normalisation options.
