Essential terminology
Professionals in the design and print world are used to the arcane vocabulary of the industry which has developed over hundreds of years. You will need to be familiar with most of these terms if you are to understand this article and communicate with printers! Here are some of the essential terms ...
- CMYK = the colour system for full colour printing
- Printing plate = an aluminum plate that contains an "etching" of one of the colours to be printed (4 are required for CMYK printing)
- Imagesetter = a machine that creates CMYK film separations, used to create the printing plates, from a finished postscript artwork file
- Platesetter = a machine that creates printing plates directly from a finished postscript artwork file. Has made imagesetter's redundant
- Offset litho = standard print process involving plates and inks employed for long runs
- Repro = the whole process of offset litho printing
- Digital printing = essentially a high quality inkjet printing process for short runs
- RIP = raster image process, the process of turning a page layout file into a postscript file which can in turn "drive" an imagestetter or platesetter
- Pantone = a widely used colour specification system for printing.
- Process colour = essentially CMYK pantone colours
- Em = unit of typographical measurement
- Markup = the process of writing styling instruction onto a (usually) typewritten piece of copy
- Stet = Markup shorthand meaning "leave it as it is"
- Spot colour = colour that cannot be reproduced by CMYK, such as gold, and requires an extra plate and run through the press
- Positional's = rough low quality scans of images created and positioned by the designer to show the correct size, crop and position to the printer who will later create and position the finished high quality scans prior to platemaking
- Proofing = the process of checking an artwork or a sample finished printed product for errors or defects
- Cromalin = high quality glossy proof type NOT taken from the actual print run but created using a separate process
- Dye sublimation = another print proofing process
- Laser proof = hi quality low cost laser print usually not adequate to check critical colour jobs
- Pull proof = expensive proof taken from the beginning of the actual offset litho print run
- Pre-flighting = the process of a checking an artwork file to ensure there are no elements missing (such as fonts) or errors
- PostScript = a computer language that can describe a complete artwork layout (fonts, images, graphics and all) and drive a platesetter or imagesetter
- Mono = black and white job
- Trim = the part of a page which is cut away and discarded during printing and which is defined on an artwork with (solid) trim lines
- Bleed = any element of a design, such as an image, which extends to the edge of the paper, must extend at least 5mm over the trim line.
- Stock = paper or card, matt, stain or glossy finish
- Weight = the thickness of the stock usually expressed in gsm or "grams". 80 gram is good for magazines but too flimsy for folded leaflets etc which should be 150 gram or heavier
- Finishing = the process which come after printing, including, trimming, folding and stitching
- Z-folding = a concertina folding process
- Wire stitched = finishing term for stapling
- Saddle stitch = standard wire stitching process whereby the pages of a job are folder straight down the middle and stapled.
- Gathering = the process of putting all the various pages in order before stitching
- Blind embossing = a "stamped out" raised area that requires a dye block
- Thermography = a process that applied heat to an area to cause the ink to expand a rise up
- Spot varnish = an area with a glossy finish
Overview of complete professional artwork to print/repro processes
Here is a simplified overview of the essential processes ...
- Determine basic form of the work and supply client with design and printing quotations, and sample stock (paper, card?)
- Copywrite text
- Create and/or buy images
- Layout in Photoshop (single page only) or a page layout program (single or multiple pages)
- Client proofs artwork
- Client OK's artwork (signs off on it)
- Deliver to print/repro company
- Printing plates created (by a platesetter)
- Proof generated and delivered to designer/client
- Proof OK'd by designer and client (they sign off on it)
- Plates made
- Print duplication process (printing)
- Finishing (trimming, folding, stitching etc)
- Delivery to client
Creating artwork
Choosing an artwork creation program
You can create artworks in Photoshop or a page layout program. Artworks must be in 300dpi / CMYK colour mode if you want professional full colour print by a professional printing company.
| Single page documents | Use Photoshop or a page layout program |
|---|---|
| Multi-page documents | Page layout program only |
Page layout programs (for multi-page documents)
An artwork (or page) layout program is used for assembling text, graphic and images components into a finished piece of multi-page artwork. QuarkXpress and Adobe InDesign are the pre-eminent applications for doing this. You can use Photoshop to create single page artworks (such as flyers) but you cannot make multi-page artworks in it.
A page layout you use you must ensure that it does the following ...
- It must allow you to specify Process Colour (Pantone).
- It must output a file that contains CMYK separations (the professional full colour print process uses at least 4 separate plates and inks).
- It must allow you to import CMYK EPS and TIFF or Photoshop images for inclusion in your layout.
- The file format it creates must be acceptable by the print / repro company you intend to use. Generally Quark, InDesign or PDF 300dpi/CMYK/PostScript files.
Note: DO NOT use a word processing program, it will NOT produce CMYK separations.
As you lay out your artwork consider the following ...
- When you import images into picture boxes, the program creates on-screen low resolution previews for you to work with. Sometimes these don't look too great but don't panic, they're only previews. Some programs allow you to raise the quality of previews at the expense of performance in screen re-draws as you move from one page to another.
- Specify all your layout colour (rules, boxes, fonts etc) from the Pantone Process colour palette.
- Avoid spot colour if you don't want the expense of an additional plate. Spot colour requires the mixing of an additional ink and another pass through the printing press.
- Try to use only PostScript or OpenType fonts.
- Make sure that images which bleed over the edges (or trim marks) of your artwork do so by at least 5mm.
Image resolution for print
It is important to create your images at sufficient resolutions for the output print process.
| Images for print | |||
|---|---|---|---|
| Print type | Recommended artwork resolution | Print dpi | Recommended bit depth |
| Standard print resolution | 375 dpi | 300 dpi | 4 chan/CMYK 32-bit |
| Newspapers | 150 dpi | 100 dpi | 4 chan/CMYK 32-bit |
| Glossy magazines | 375-450 dpi | 250-300 dpi | 4 chan/CMYK 32-bit |
| Billboard posters | 40 dpi | 25 dpi | 4 chan/CMYK 32-bit |
| Hi-quality art books & prints | Up to 1500 dpi | Up to 1200 dpi | 4 chan/CMYK 32-bit |
Example artwork creation workflow
Here are 2 example workflow's in detail ...
Flyer artwork in Photoshop (single page document)
- Buy or take photographs
- Create illustrations
- Copywrite text in a word processor, refine it and spell check it
- Create a new 300dpi / CMYK document in Photoshop
- Import and edit photographs and illustrations
- Copy and paste text from word processor to a new layer and style
- Find a print/repro company and ask them how they would like the artwork delivered
- Create a high quality JPEG and email to your print/repro company
- Create a high quality PDF and email to your print/repro company
- Save a high quality Photoshop file and ftp or put on a disc and deliver to your print/repro company
- Optional: Ask your print/repro company for a printed proof in order to check colour balance before reproduction
CD inlay and booklet artwork in a multi-page layout program (InDesign or QuarkXpress)
- Buy or take photographs, edit them, and convert them to 300dpi / CMYK colour mode
- Create illustrations, edit them, and convert them to 300dpi / CMYK colour mode (convert any text in eps files to outlines)
- Copywrite text in a word processor, refine it and spell check it
- Create a new document in your page layout program in 300dpi / CMYK colour mode
- Create a grid, trim marks, master page guides and a structure of pages as appropriate
- Create image boxes and import and arrange photographs and illustrations
- Create text boxes, and then copy and paste text created in the word processor into them
- Create character and paragraph styles to apply to your text
- Specify any colour for lines, boxes and text etc in an appropriate colour mode (normally Pantone Process)
- Find a print/repro company and ask them how they would like the artwork delivered
- Create a disk with your artwork file, accompanying image files, and a folder of fonts used (illegal but necessary as a fail safe) and deliver to your print/repro company
- Create a high quality 300 dpi / CMYK PDF and email to your print/repro company
- Essential: Ask your print/repro company for a printed proof in order to check colour balance before reproduction
- Create a web ready 72dpi / RGB colour mode version for distribution by email and the web if necessary
Options for print/repro processes
Reproduction involves printing multiple duplicates of your artwork and finishing them (trimming, scoring, folding, stapling etc). There are 4 primary choices ...
1. Consumer printer
You can print at home on a consumer quality colour laser (or inkjet) printer and spend a few evenings finishing with a scalpel, ruler (and stapler?) but it is unlikely that the full quality of your artwork will be realised and its a bit of a chore for runs of over 20.
2. Professional laser printing
Have your job printed on a professional quality colour laser printer. Many image setting bureaus and graphic design studios use such machines to produce proofs and may agree to a short run (50-300) for you. Quality will be superb but you will probably be limited to one paper type, print will be single sided only and once again you will have to finish them yourself.
Indigo digital printing press
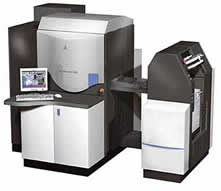
3. Digital printers
For medium runs (500-1000) it may be cost effective to use digital printing and finished by a bureau or print / repro company with a professional HP Indigo printer or the like. These machines are essentially up-market inkjet printers capable of superb results. One downside is that the ink does not bond with the paper as well as offset litho so drying times are longer and ink can more easily run off.
Full colour (CMYK) offset litho printer
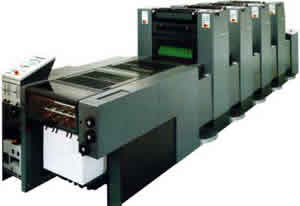
4. Offset litho printing
Longer runs (over 1000) will require professional repro (offset litho printing) by a print / repro company. Litho printing has been around for a long time and for good reason. All long run print jobs from brochures, magazines to cereal boxes use this method. Whereas full colour (4 colour, CMYK) used to be expensive, it is now routine and cheap providing your job does not require elaborate finishing. Repro companies will probably offer a package deal which involves scanning and positioning photos, plate setting, proofing, duplication and finishing. Shop around.
Finding a print/repro company
Because it is possible to send artworks (usually PDF) to a printer via email or a web interface, you are not restricted in who can print your job. Many designers however, prefer to use a local printer that they can go and see and discuss a job with. We agree, a personal relationship with a printer can stop lot of problems arising and during this stressful part of the process you need to feel fully confident in the company you are using. Search for "printers" in local directories and on the web.
Delivering artwork to a print/repro company
| Single page documents | JPeg Photoshop file Page layout program file with accompanying images and fonts |
|---|---|
| Multi-page documents | Page layout program file with accompanying images and fonts |
Using PDF's
Many (most?) printers now prefer to receive artwork in high quality CMYK, 300dpi PDF format for the following reasons ...
- All the elements (text, images etc) are contained (embedded) within the file so everything should look exactly like the original page layout artwork file from which it was derived.
- Fonts are embedded in the file (or converted into outlines) which gets around the problem of incorrect font substitution during the repro process.
- The printer can more easily store these files for future print re-runs
- It makes the repro process cheaper for you them and therefore you
You will typically either email the artwork if its small enough, use a printers ftp web interface to upload it to their server, or deliver it on a CD or DVD-ROM.
Proofing
You MUST proof your artwork before it is duplicated. A proof is a one-off print of your artwork which you can check for any technical, layout and colour errors. For the first time you will be able to see with accuracy what your pixel based images (photographs) will look like.
You can buy a proof from a print/repro company or an Image Setting Bureau. There are several different types of proofing from digital laser printers, dye sublimation, cromalin and colour photographic proofing systems right up to an actual short offset litho run itself, but know this. A cheap colour inkjet WILL NOT DO.
The only accurate way to proof colour is to have a proof printed on the final output printing device, be it laser printer or offset litho printer.
A word about PostScript
PostScript is a language that can describe a complete artwork layout (fonts, images, graphics and all). High quality output devices such as laser printers, digital colour printers, and platesetter's for offset litho printing require PostScript files to drive them.
The process of converting a 300dpi / CMYK artwork into a PostSCript file is called Ripping. The PostScript ripping software is often built into the device itself and generates the PostScript code required to drive the hardware elements of the device.
As you prepare your artwork you may encounter many references to PostScript. If the artwork program you are using can generate a file containing the necessary CMYK colour separations, or output a PostScript file, and is acceptable to the Bureau or print / repro company you intend to use, you will be able to have your artwork duplicated professionally.
Because both InDesign and QuarkXpress are universally used by all graphic designers to create artwork layouts, the files they create are acceptable by most printers for PostScript RIPing.